
Chick Care Guide
Spring is the promise of new life and when everyone gets excited to add baby animals to their lives. Before you grab a handful of baby chicks, let's make sure we do it right!
I hatched my first chick in 2006! I have been hooked ever since. I have learned a ton over the years and I love sharing that with others. Welcome to my chick care guide. Please CLICK HERE for my Chick Supply List.
First Things First
WHEN
The ideal time to bring home chicks (for most climates) is Spring. This is because chicks need to be kept warm and in the Spring it is easier to regulate their brooder temperature and allow them outside play time if there isn't snow on the ground! If you live somewhere with a cold winter, keep this in mind. You don't really want to keep them in the house because as they get older, they become really messy and stinky! A garage, shed, or even in the coop(as long as it isn’t too cold) is best.
That being said, I have also brought home chicks in three foot of snow and just adjusted my set up to keep them inside for a few weeks before they could go to the garage. But, as a beginner, warmer weather will be your friend.
WHERE
There are many places you can purchase chicks. I make it a rule to only buy from NPIP certified breeders or hatcheries. This means they are properly testing their flock for disease and it is being monitored by the chicken police. Chickens are great at hiding disease and chicks that might look healthy from down the road, might not be. We'll go over proper quarantine procedure as well. You can also buy chicks from a farm supply store. If you do this, be sure they are lively, eating and drinking, and don't have injuries. Also be prepared to get a surprise rooster or two.
My favorite hatchery is Meyer Hatchery. I have been using them since 2006 and love my experience with them. Feel free to use my code “purelychickens” if you order from them.
ou can also hatch your own chicks in an incubator or let a broody hen do all the work. Keep in mind, you will likely end up with half hens and half roosters. Or in my case the last time, 75% roosters! I like ordering chicks because you can choose hens if you want. If you are getting meat chickens, this doesn't matter.
HOW
When purchasing egg laying chickens, the breeds can be mixed or all the same. I personally like having a diverse looking flock and egg basket. I choose my chickens based on fun egg colors, feather patterns, cold hardiness, and personality. I have never come across a breed I didn't like. If you go to your favorite hatchery's website, they should have detailed information about each breed. It's hard not to buy them all so try to start small and add chicks in later years. Chickens often slow down egg laying or stop laying later in life. Adding chicks every other year or so will ensure you have layers at all times.
WHAT
I have a diverse flock of 30 chickens consisting of mostly different breeds. I often get asked what breeds I think are best for beginners. My favorite breed is the Orpington. They are fluffy, friendly, & calm. I like that they don’t cause drama in the flock and they also come in many different colors including blue, black, splash (white with black speckles), buff, lavender, jubilee and more. I love my wyandottes and marans for some of the same reasons!
For a color basket, check out Easter Eggers, Olive Eggers, Ameraucanas, and Black Copper Marans! Honestly, browse the different breeds that are offered and see which ones you like the look of. Read about their temperment, egg laying ability. See what fits for you!
Brooder Setup
A brooder is the area your chicks will live in until they are ready to go to the coop. This area will need to last for about 6-8 weeks and they grow FAST! Be sure to pick something appropriately sized for the amount of chicks you plan to get. Aim for 3/4 sqft - 1 sqft per chick. It is best to set it up before they arrive.
CONTAINER
I have used many things over the years. Everything from a cardboard box to a huge stock tank. Here are my favorite options. The best place to set up is in a garage that isn't too cold. Ideally, you don't want chicks in your house. They create a lot of dust and it isn't safe to breathe in their dust from droppings. They will also stink! If I get them while outside temperatures are below 50, I will keep them in the house until they are 2 weeks old or until temperatures rise a bit.
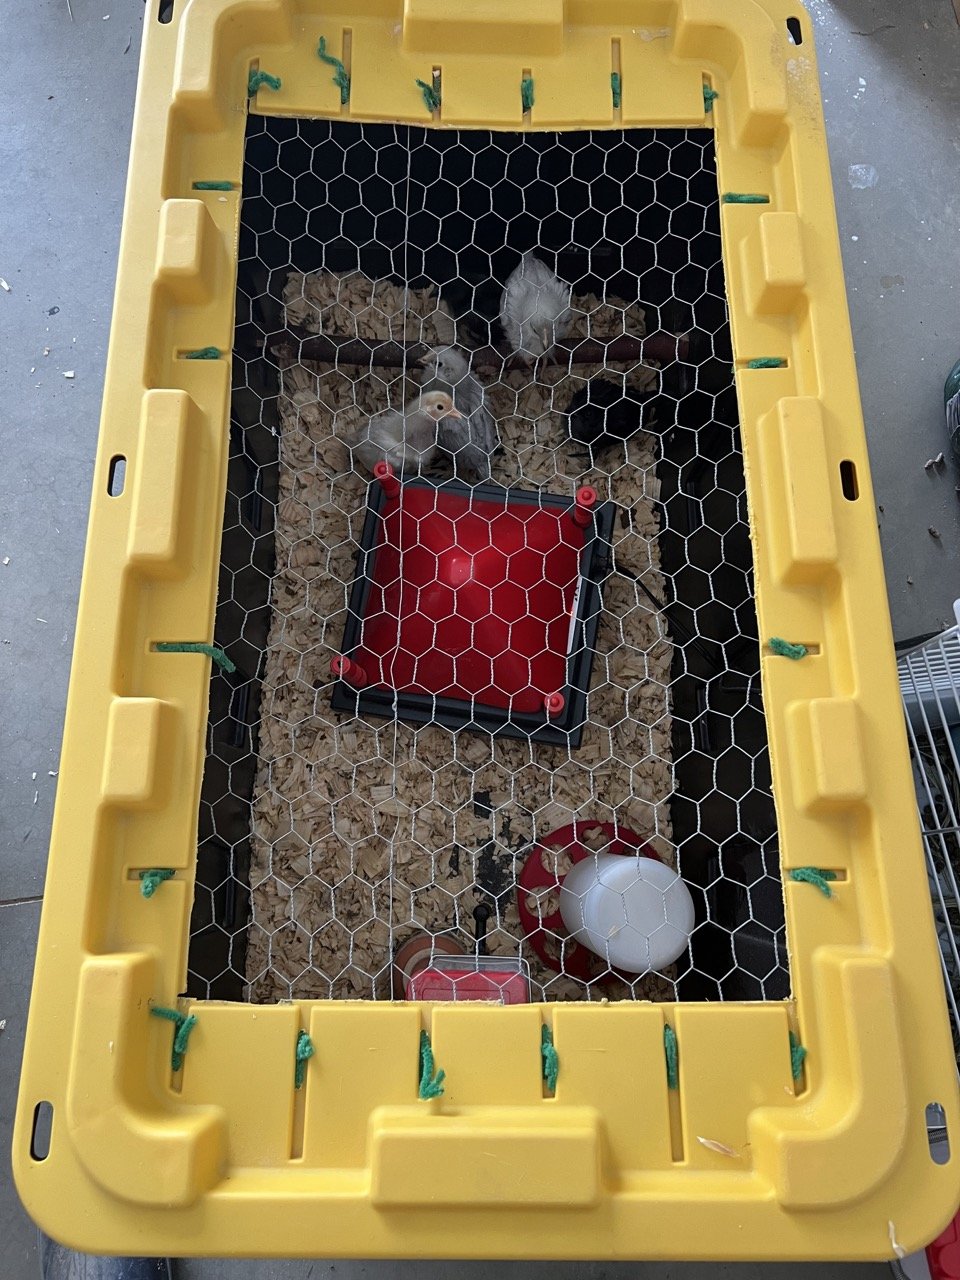
For up to 5 chicks: I love using a 40 gallon storage container. I got the black and yellow one from Lowes and cut out the middle of the lid. I drilled holes around the edges and used pipe cleaner to secure chicken wire. Very DIY but it has lasted me for years and is very easy to clean and disinfect for the next set of chicks. Rabbit/guinea pig cages that you buy at the pet store also work well. I start all of my chicks in this one for the first week or two.
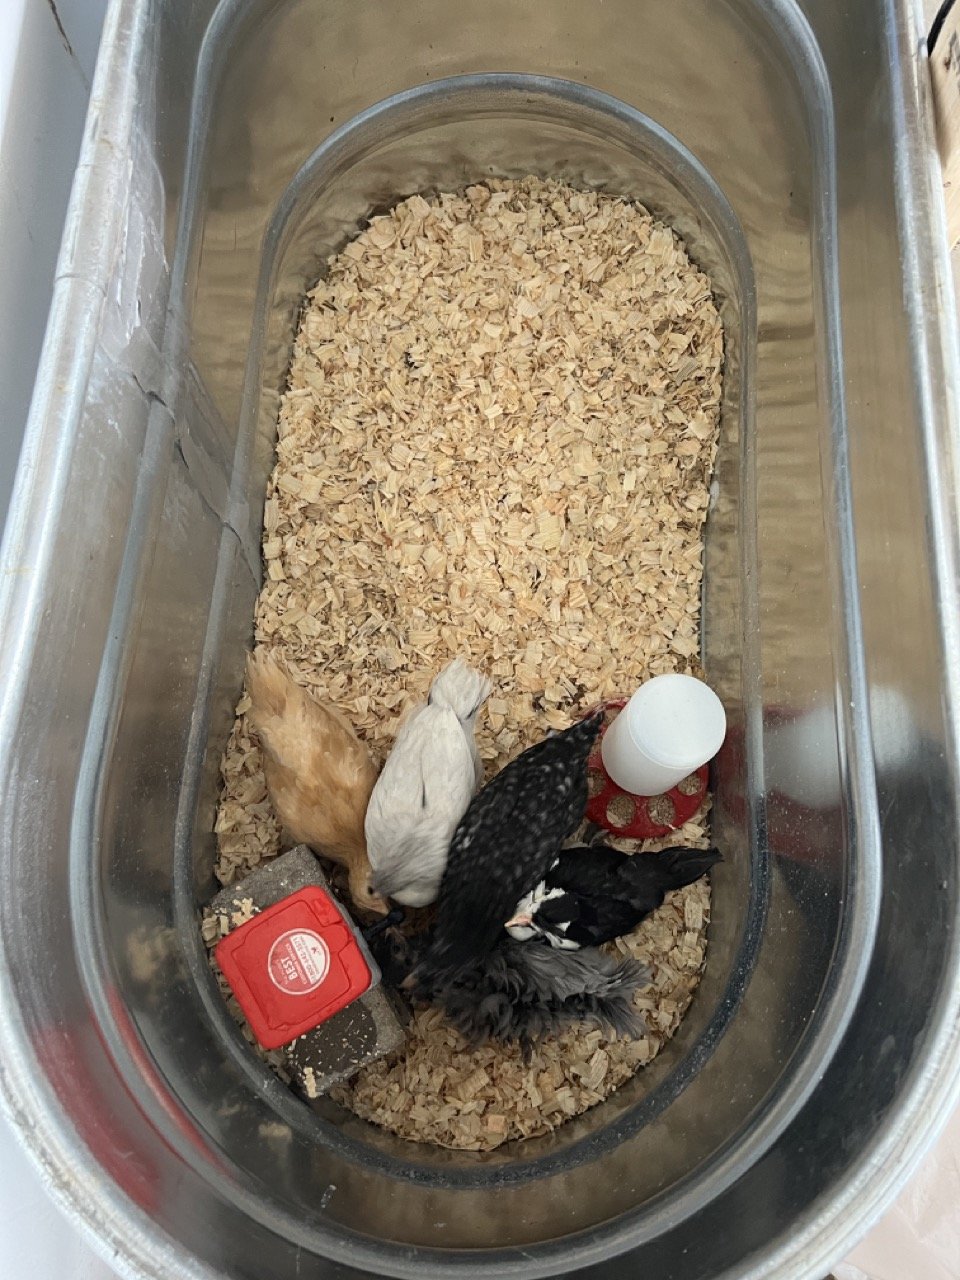
For up to 15 chicks: I have a 2'x4' metal stock tank from Tractor Supply. I made a lid out of hardware cloth (you could also use chicken wire) and it works quite well! It is heavy and hard to store, which could be a deterrent for some.
For 15 or more chicks: A pop up play pen is a great idea. Be sure to cover the bottom with enough bedding to keep the fabric as clean as possible. You can also use puppy pee pads to line the bottom and cover those with bedding. Another great option is giant dog cage. You will want to line the bottom of the walls with cardboard or chicken wire so they don't fit out the gaps while they are little (remember they will jump high so go up a few feet).
You can also build your own brooder. There are many ideas on pinterest and etsy!
A DIY brooder we made for a small amount of chicks. I used my kid’s pipe cleaners to attach the chicken wire.
A larger stock tank for older birds or more birds. (Their roost was missing to be cleaned and they no longer needed heat at this point)
HEAT SOURCE
Chicks need heat. But, they don't need a heat lamp! Heat lamps are dangerous fire hazards and every year I hear of coops, barns, garages, and houses being burnt down because of one. No matter how secure you think it is, a loose floating feather, a droplet of water, a faulty wire, or a flying chick can cause issues that lead to a fire. The red light is damaging to their eyes and having a light on 24 hours a day doesn't help them learn a sleeping pattern. The constant heat is also not helpful in learning to manage in different temperatures so transitioning them out to the coop is more difficult.
So what do you use instead? My favorite option is a brooder plate. It is a heated plate with legs that the chicks crawl under when they are cold, and come out of to eat, drink, and play. You start it fairly close to the ground and raise it as they grow. This setup is much more like the way a mother hen raises her chicks. I like THIS ONE because it comes with a cone lid preventing the chicks from pooping on top of it. I suggest getting a 10" one for no more than 8 chicks. They come in larger sizes as well. Besides not being a fire hazard, brooder plates are great because they allow the chicks to wean themselves off heat naturally. You will be able to easily tell when they are done using the heat and ready for the coop.
Keep in mind, if the power goes out you'll want to have a back up plan for heat. Two options are heating water on the stove and putting it in a rubber hot water bottle or you can have a stash of hand warmers that you can put in with the chicks. Make sure the chicks don't peck it open. I would wrap it in a towel. Replace both options often to keep the heat up. I do keep a heat lamp on hand in case a chick arrives too cold and needs heat fast. I use it while holding the chick under supervision and unplug it when we are done.
WATER
Chicks need water as soon as you bring them home. I like to add electrolytes and vitamins to their water for at least the first week. Make sure they have clean fresh water at all times. THIS is the absolute best kind of waterer you can use with your chicks. They can't spill it, it doesn't get the bedding wet, they don't poop in it, and it doesn't fill with bedding four times a day. Clean water is a MUST for healthy chicks. It is easy to train them to use it. You just tap it and they will be curious right away. I use the same type of waterer for my adult chickens. When they start with this type, I don't have to train them later. Make sure they all drink before leaving them alone for the first time.

FOOD
Your chicks will need food as soon as you bring them home. Look for chick feed. It should be specifically formulated for chicks. They will be on chick feed for 18 weeks. Some brands have a starter feed for 0-8 weeks and a grower feed for 8-18 weeks and some brands lump them in to one type and label it “starter/grower”. There are two chick feed options. Medicated or not medicated. Medicated feed helps prevent coccidiosis for the first few weeks and then I switch to an organic crumble. If your hatchery vaccinated for coccidiosis, you do not use medicated feed. Some hatcheries have that as an option. Other vaccines do not play into this decision. I have raised chicks both with and without medicated feed successfully. Now that we only feed organic we skip the medicated feed and just keep the brooder area and water clean.
I do not give my chicks anything except their chick feed until the are integrated into the coop. They really need all their food to be from the nutrients formulated in the feed until they are full grown.
Here are a few of my favorite feeders for your chicks. Choose an option that has enough spots for all of the chicks to eat so they don't pick on each other.
Our favorite feed is from Scratch and Peck Feeds. We use the starter crumble for 8 weeks and then switch to the grower crumble The mash is also a complete feed but it is in a whole grain form so they will need grit to go with it.
BEDDING
There are many bedding options for baby chicks. You can use pine shavings, hemp bedding, puppy pee pads, or straw. I personally like hemp bedding because the clean up is easy and I can put it straight into the compost. It is also dust free and helps control the smell. Avoid cedar with chicks as it is bad for their health. Change the bedding every few days and add a little to the top on the days you don't completely change it. I like to give the container a wipe down with one of the cleaners below before adding new bedding. My favorite bedding is from Eaton Pet and Pasture and my discount code with them is “purelychickens”.
Cleaning Spray Recipe:
8 oz glass spray bottle
1 part water
1 part distilled white vinegar
10 drops of OnGuard* essential oil
OR:
8 oz glass spray bottle
Fill almost to the top with water
add 1/2 of the Abode* concentrate
You can read more about the essential oils I use with my chickens HERE :)
ROOSTS & TOYS
Your babies should have somewhere to practice roosting. You can use any type of DIY roost made from thick sticks or pieces of wood. I like using ones that are about an inch in diameter. Here is an option if you would rather buy one.
Toys, ladders, parrot toys are great to rotate in the brooder to help keep them busy. Here are some fun ones to try out!
Handling Chicks
It is important to always handle chicks with clean hands. Wash your hands before and after handling them. Chicks are susceptible to many illnesses. They are fragile and need you to keep them away from germs! If you have children, make sure they follow these steps as well.
HOLDING
It's human instinct to want to pick up and hold fluffy cute babies. I want you to avoid this instinct! Chicks are impressionable. If you come at them with grabbing hands and sudden movements, they are going to learn to avoid you. Those things are scary for them. Because many of their predators come from overhead, they are born with the instinct to beware of this.
Instead, what you should do is let them come to you. I like to place my hand down on the floor of their brooder and sit calmly. Sometimes I put food in my hand and scratch at it with my palm. This scratching brings them from across the brooder to check out what is happening. Before long, they climb onto my hands on their own. They need time and patience to learn that you and your hands are safe. It won't take long before your babies are climbing up your arm and sitting on your shoulder.
SIDE NOTE
Keep in mind, some chickens just don't want that human interaction. It is not advised to force any unwanted attention on a chicken. Learn their personalities and really take time to make them feel comfortable around you. As they age into adulthood, don't be surprised if they change their mind about you and decide you are only good for food. They might dodge your touch. This is okay too and as flock owners, we must show them respect.
Check out this video about handling brand new chicks... *Chick Handling*

Outside Time
Your chicks will appreciate time outside of their brooder. If it is warm outside (60s and above) you can take them out in the sun to play. Pay attention to their cues. Check out this video... *Outside Time*

This is Cruella out for a stroll on a warm winter day! It was about 60 out and the snow had not started melting. She loved the sunshine but didn't stay out long.
Flock Integration
In this section, I will talk about how to move your chicks out to the coop. Whether this is your first set of chicks ow if you have a flock already out there, there are a few important steps.
MOVING TO THE COOP
Before moving the babies to their outdoor coop, they need to be fully feathered. This usually happens around 5-6 weeks so I wait until 6 weeks to be safe. Once they are fully feathered, they no longer need heat to keep them warm. If you have been using a brooder plate, nothing else needs to happen but if you used a heat lamp, they need to be weaned off that heat so make sure you are dropping their brooder temp weekly. I like to move chicks out when the temps are above 50 degrees fahrenheit.
NO OTHER CHICKENS IN THE COOP
If there are no other chickens out there, this part is simple. I like to keep them in the coop and run until they are laying eggs. This serves two purposes. It helps them get to know their area and makes it more likely they will use the nest boxes instead of your favorite azalea bush as an egg laying spot. It also keeps them safe from predators while they are too little to defend themselves.
Spend some time showing them where their food and water is located. At dusk, you will want to show them where to sleep. Sometimes you have to pick them up and put them on the roosts. This might go on for a few nights until they figure it out. If you have an automatic door, check on them until they all figure out that the door goes down and they need to be inside before that happens.
EXSISTING FLOCK
If you already have chickens in the coop, your babies will do best if they are introduced properly. The flock will try to establish pecking order right away and since the babies won't be able to defend themselves, they could get injured in the process. These techniques have worked for me every time and no babies have ever been hurt in the process.
Put the babies in an enclosure in the run. The big chickens should be able to see them but not hurt them. THIS one would work well. I provide them with their own food and water. I also give them a roost. At night I move them to a small dog crate with a roost inside the coop. They do not need food and water at night. In the morning, I move them back out to the other crate. I do this for about 2 weeks. After that I will prop up the crate or prop open the door so the littles can get in and out but the big ones can't fit. This allows them to get used to being with the flock on their own terms. At this time you should switch everyone to flock raiser feed until the little ones are at 18 weeks and then you can go back to layer feed. Soon you'll notice they don't use their crate and you can take it away.
Here are some videos explaining that better:
Integration for older hens is done by following the same steps. You will need a place to keep them separate but let them see each other. You can shorten the time to about a week instead of two. Observe them closely to make sure they are all falling into place.
That's it! You are now a backyard chicken keeper. Congratulations! I hope you found this guide helpful.
Other Helpful Guides:
Make sure to follow me on Instagram @purelychickens and tune in to my Q&A Sundays! Follow me on TikTok @purelychickens for chicken keeping fun and Youtube @purelychickens for longer form explanations!